• Skip to primary navigation
  • Skip to main content
  • Skip to primary sidebar
  • Skip to footer

Heritage Acres Homestead

Chas - Homemaker, Homesteader & Mother Hen

  • Home
  • Homeschool
  • Homestead
  • Cooking
  • About
  • Shop
  • Amazon Storefront
  • Show Search
  •  
Hide Search

Soapmaking 101

Chas · April 26, 2013 · Leave a Comment

Good Morning! I am going to attempt to show you somewhat step by step how to make soap. With permission from my friend Ashlee to share the recipe that she shared with me. 
First off you need to gather all your materials. 
Oils
Scale
Stainless Steel Stock Pot
Stainless Steel Spoon for stirring 
Hand blender
Lye
Water
Soap Mold
Non reactive container (that is what I used my plastic coffee can for)
I will say this. These pictures are not great. I had planned on having someone man the camera for me, but my girls were babysitting, my boys were chasing a rooster and my husband was mowing the yard. So you get some blurry shots, and some haphazard directions, but hopefully you will be able to make yourself a batch of soap soon!
The recipe for the soap is:
Oils
20% coconut oil = 12 oz
20 % castor oil = 12 oz
30% olive oil = 18 oz
30% lard = 18 oz

Lye Solution
lye= 8.1 oz
water= 18 oz
A little bit about soap molds… You need something sturdy, that will withstand the heat. I saved an old coffee creamer box. I am trying not to buy these anymore (because of the horrid ingredients), but I knew this box would make a great mold. I opened it up and cut one whole side off. I folded the edge in and duct taped it. It’s already got one of those waxy finishes, so I didn’t line it with wax paper. IF it was a regular cardboard box or a dish. Line it with wax paper, that way you will easily be able to get your soap to release. 

Baby Stepping through friends… here we go!
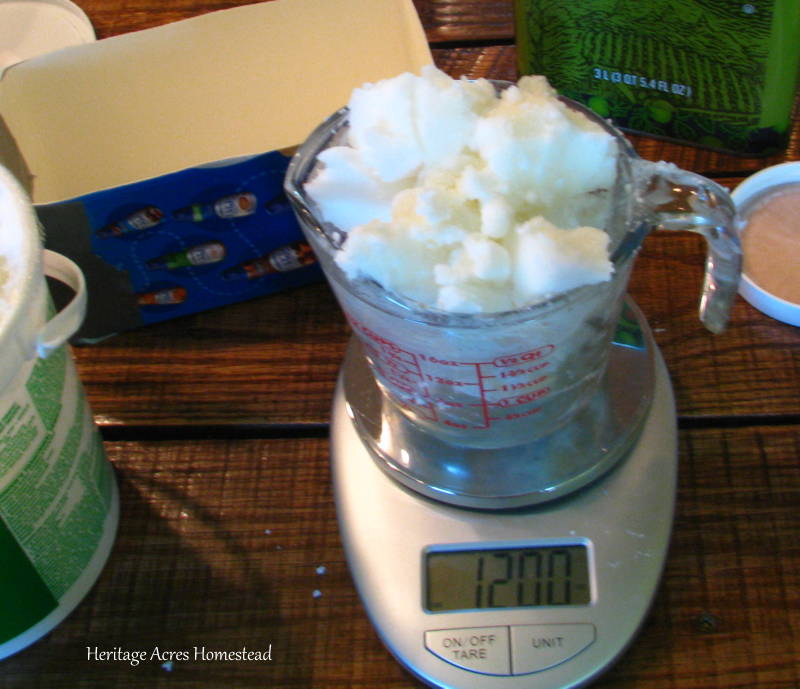
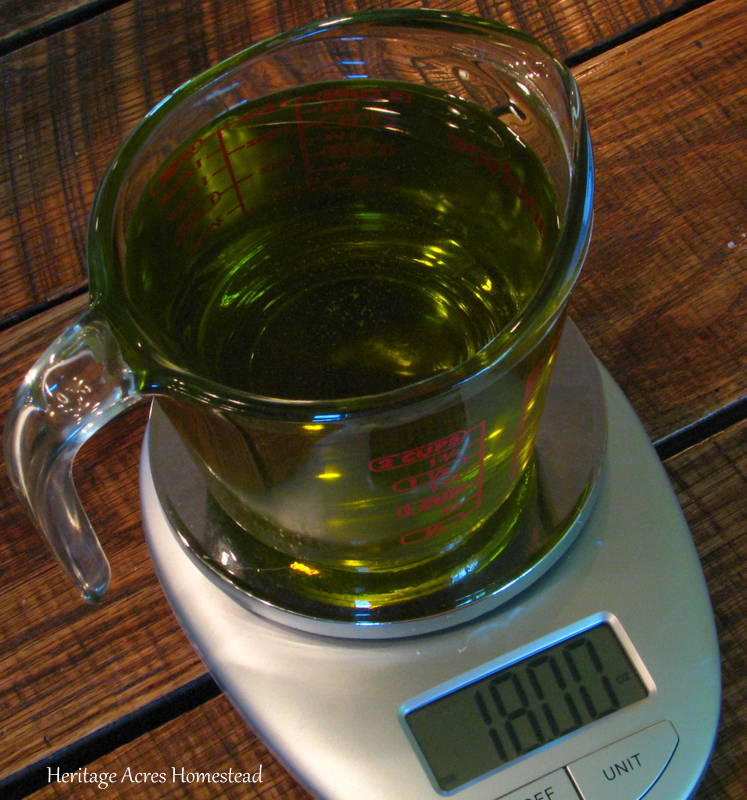
Measure out your hard oils, which are coconut oil and lard. These two will need to be melted to get ready for your soaping. Measure exactly and go ahead and put them on low in your soap pot and melt them gently.
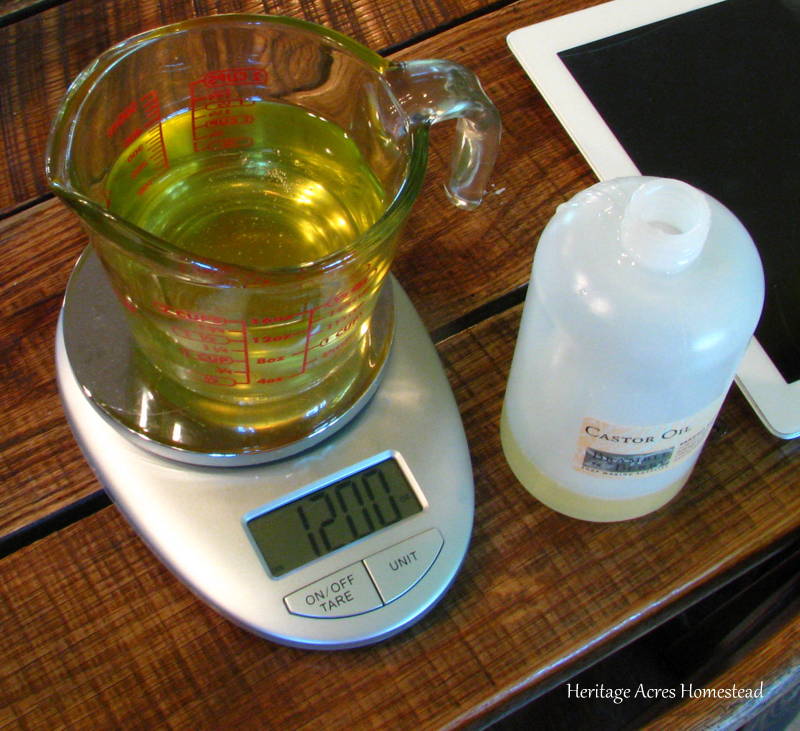
Measure out your liquid oils

Once your hard oils are melted and you combine your liquid oils, set it aside and get ready for your lye mixture. 
I measured 18 oz of ICE water. This helps cool the lye mixture down LOTS, because when lye mixes with a liquid it heats up DRAMATICALLY!!!! The ice is a great idea to bring down the temp easily. 

Measure your lye. I like to keep a glass measuring cup just for this purpose. It has a pouring spout to make transferring your lye into water a breeze.
Remember…
Lye into water is so much smarter!
Always pour your lye into water, that way there are no splashes!

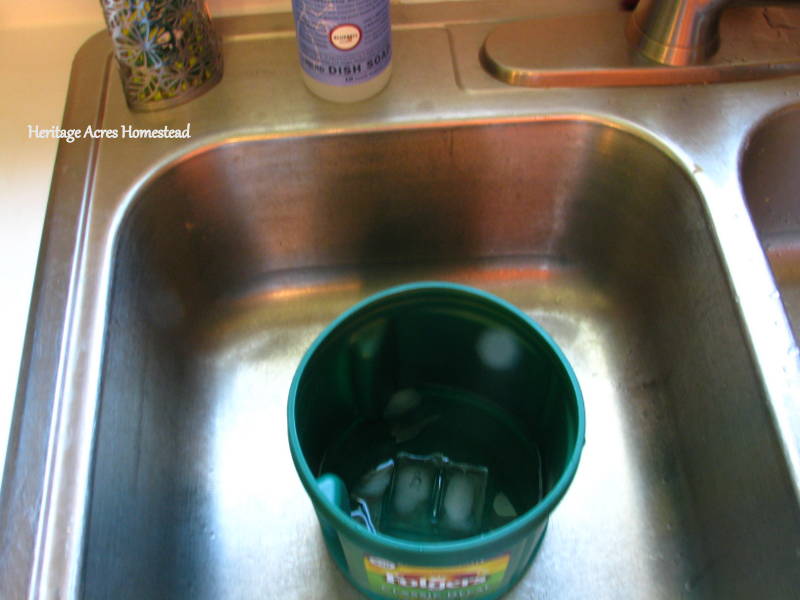
Here’s my water waiting in an empty sink.
I thought this was a great place to do the lye solution because if there ever was an accident, this would be the place to contain it.
Thankfully there has been no issue whatsoever, so far. ๐Ÿ™‚

Lye into water!

Mix well!

Now, I don’t have a picture for the waiting time, but this is our rule of thumb for both containers. The lye solution container and the oils in the pot. Once you have given them both time to cool, you should be able to feel the bottom of the container and feel warmth. If it is hot to the touch… they are NOT ready. If you can rest your hand against the bottom of container and it is warm… You are ready for mixing.

Once comfortable to touch, take it to a spot where you can plug in your immersion blender and pour your lye into your oils and get ready to BLEND!
This process can take a little while 5 minutes to even a little longer… It really depends on your recipe. Thankfully this one is easy and basic and doesn’t take that long.

You want to blend, blend, blend, without stopping til you have a nice pudding type consistency. Meaning if you were to pick the blender up and some soap dropped off the blender it would sit on the top of the mixture. Does that make sense? I tried to capture it in a picture. This is called trace.

See how goopy it is? That’s what you want.

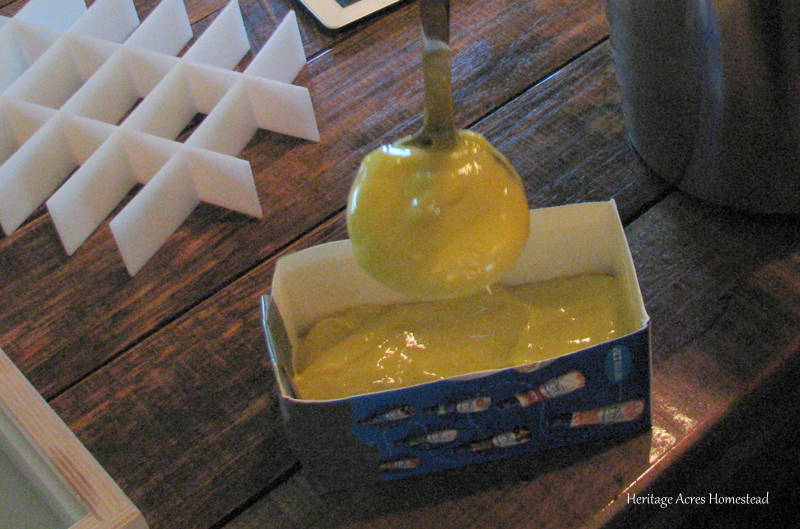
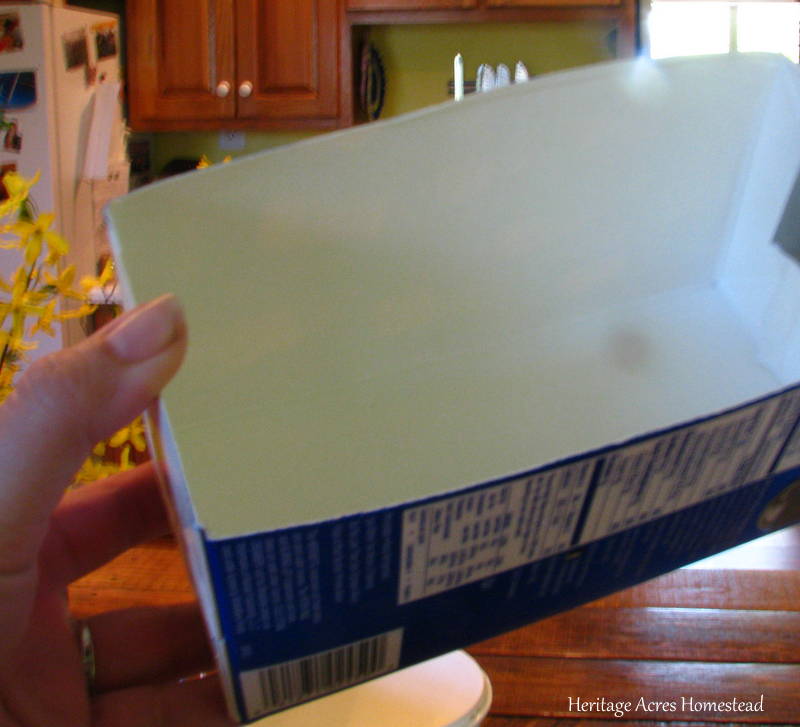
Ladle your soap into your container. I made a simple container just to show y’all that it doesn’t have to be a mold like the one on the left. Soap can easily be made in pretty much anything!

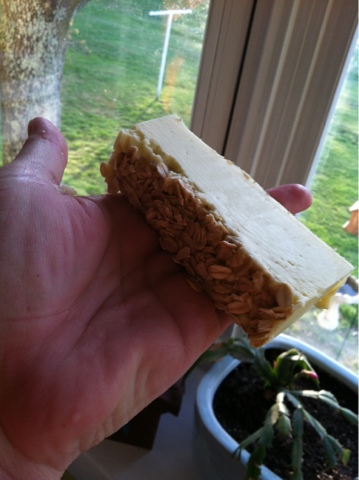
Here’s a bar that came out of the mold I made. I put some oats at the bottom for exfoliating. I also added just a bit of peppermint oil at trace to give it a light scent.

In 24 hours, you can take your soap out of your mold. Set it in a place that there is good ventilation. This will help in curing your soap. Your soap will set up and cure in about 4 weeks. The longer the soap sets, the dryer it will become and the longer it will last.

A note of GRATEFULNESS! 
Thank you Ashlee for giving me the courage to step out and try this new craft! I am so excited and so thankful! And thank you for allowing me to share the recipe with my readers! 
xoxo
Just a little disclaimer at the bottom here…
I am by no means a soap making pro. 
These are my ways of making soap. 
You may want to wear gloves and goggles because of the lye mixture. It’s not a bad idea, I just don’t do it. You may want to designate all your soap making supplies to soaping. That’s a great idea too!
This is just an aspiring homesteader learning a craft and sharing what I do with you. I hope you enjoy and let me know if you have success with your own soap making adventure.

Photobucket

Filed Under: Arts of Virtue, crafting, Frugality, handmade, health, homekeeping, Homemade, homemaking, homestead, Natural Remedies, recipes, self-sufficiency

Reader Interactions

Comments

  1. Kristin says

    April 26, 2013 at 2:21 pm

    Great job, Chas!! Thanks for the detailed tutorial….and to Ashlee for teaching you so well!

    Reply
  2. Chas says

    April 26, 2013 at 2:23 pm

    Thanks Kristin! I am VERY grateful for Ashlee giving me the courage to go ahead and do it. ๐Ÿ™‚ I'm excited to try out new recipes! Shannon said…
    Chas… just how much soap are you going to make?
    I said, Honey, I'm a prepper! However much I can! ๐Ÿ™‚ haha

    Reply
  3. Anonymous says

    October 7, 2013 at 11:20 am

    I still like to stir with a wooden spoon when I'm making my goat milk soap. Not sure why….but I enjoyed your directions and your info!

    Reply
  4. Chas says

    October 7, 2013 at 11:21 am

    Hey… When we have a way we like it, and it works, no reason not to stick with it! ๐Ÿ™‚ Thanks for stopping by!

    Reply

Leave a Reply Cancel reply

Your email address will not be published. Required fields are marked *

Primary Sidebar

About Me

Chas

Hi there! My name is Chas! I'm a homemaker, homesteader, a crafter, a homeschooling mom, a wife, a believer, a GRANDMOMA, a lover of good REAL food and coffee, a seeker of health and wellness, and I'm exceedingly fond of deep, hearty, laughter and JOY in life! Read More.

Search Topics

Social Icons

  • Facebook
  • Instagram
  • YouTube

Email Newsletter

Sign up for my email to get goodies in your inbox!

Amazon Storefront

See my recommended products!

Spring Features

Slow weekending

March 15, 2021

December has come and almost gone…

December 29, 2020

Fall on the Farm

November 11, 2020

More About Us

Footer

Latest Posts

  • It’s kidding time!
  • Sourdough Crackers
  • Out with the old, in with the new

Welcome

I’m so glad you stopped by, I hope you enjoy your visit! I post our life in pictures and a few words, recipes to remember, thoughts I want to ponder, and whatever comes our way.

Find it here

Copyright © 2023 Heritage Acres Homestead ยท Powered by Optical Lift ยท Log in