As I’ve told you, I am teaching an Art class at our new homeschool co-op. We have made several different projects and our newest endeavor is string art. I knew I would want to do a holiday theme, but I wasn’t sure what each student would want, so I contacted them and encouraged their parents to have them pick out something they would enjoy having in their room or home or giving as a gift, because these turn out so cute!
Supplies are fairly minimal, and can get as fancy as you like.
*A piece of wood cut in the size you need for the project. ( ours is about 9×10 and we printed out 8×10 pictures)
*Nails- I bought white, 1″ paneling nails
*Hammer
*Twine, string, embroidery floss, yarn… whatever type of “string” you want… in colors you want. I used embroidery floss.
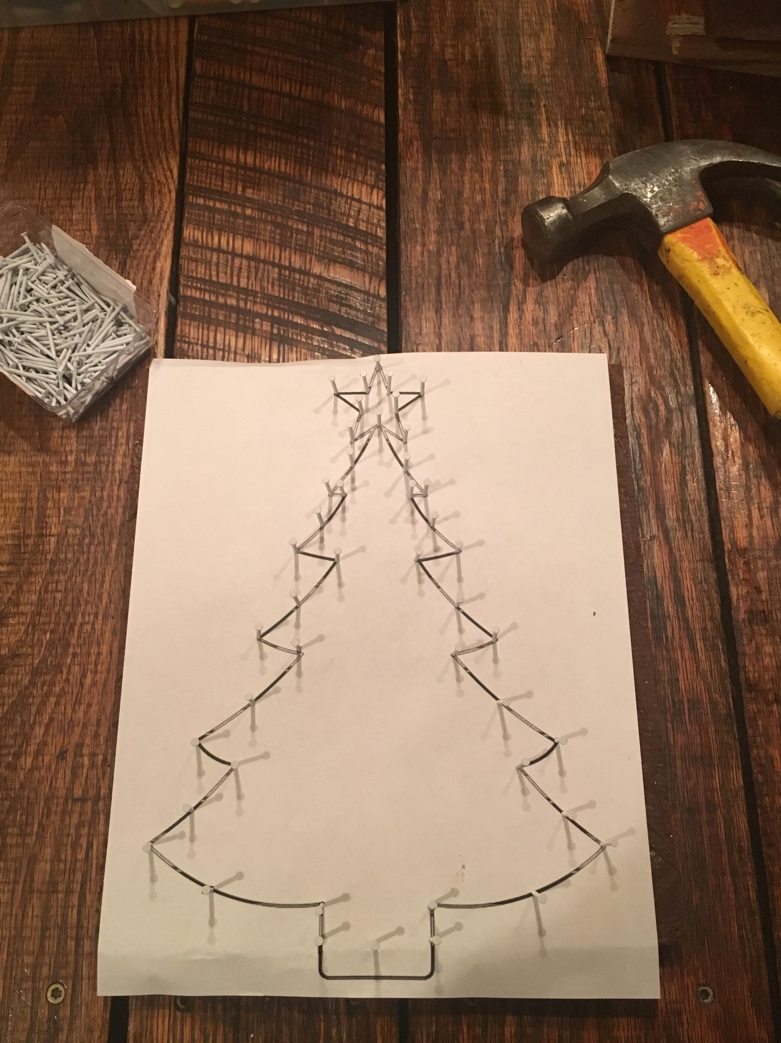
*Pattern
There are a lot of different ideas out there, some ranging from extremely difficult and elaborate, to very simple. Being their first attempt, I prompted them to pick something that had basic lines and shapes. One easy way to do this is to look for coloring pages to print. Sometimes simple coloring pages make the best patterns.
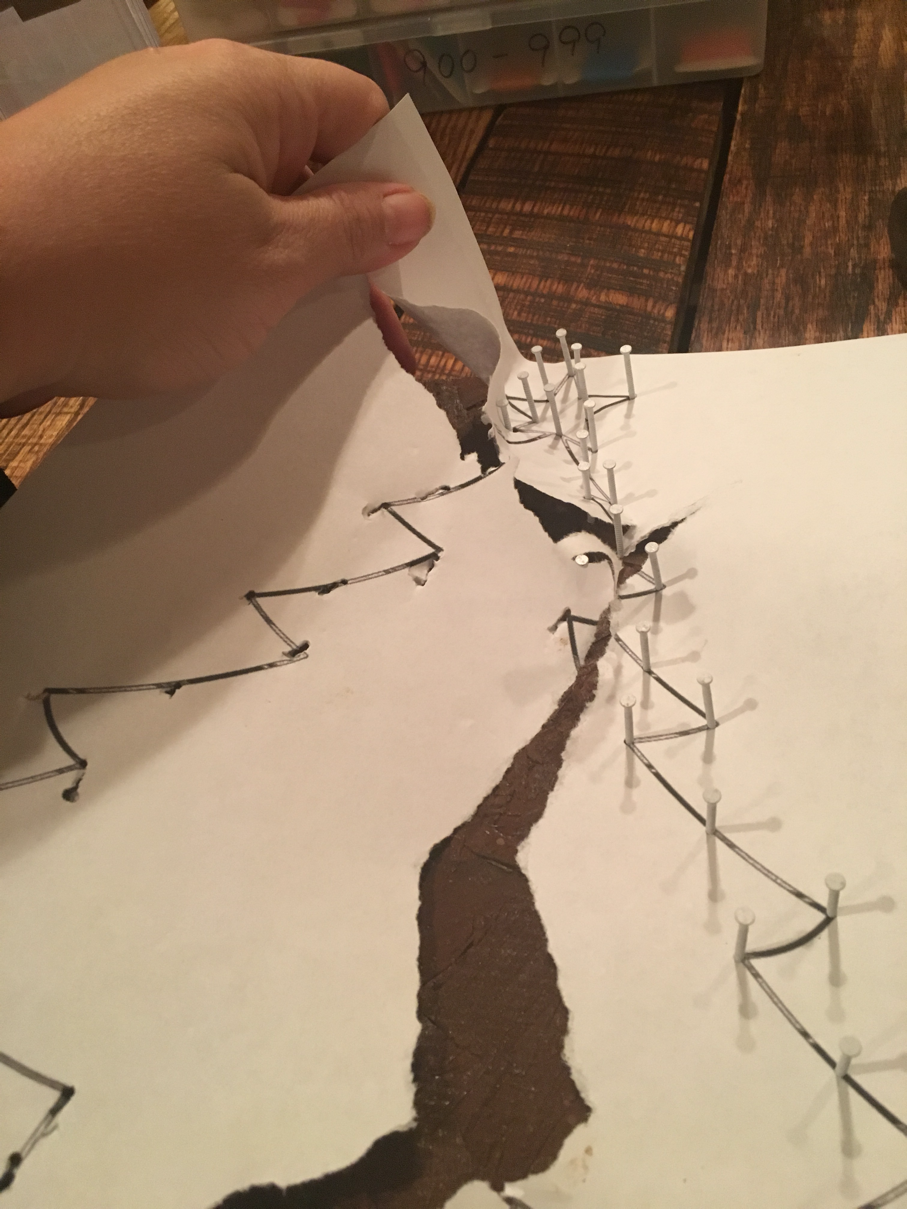
Once you have your pattern, take your page and begin hammering through your pattern. You want to make sure to put a nail at any corner and keep your nails fairly close…. but not right beside each other because you need space to wrap your string. After you have finished hammering all your nails, gently tear away your pattern.
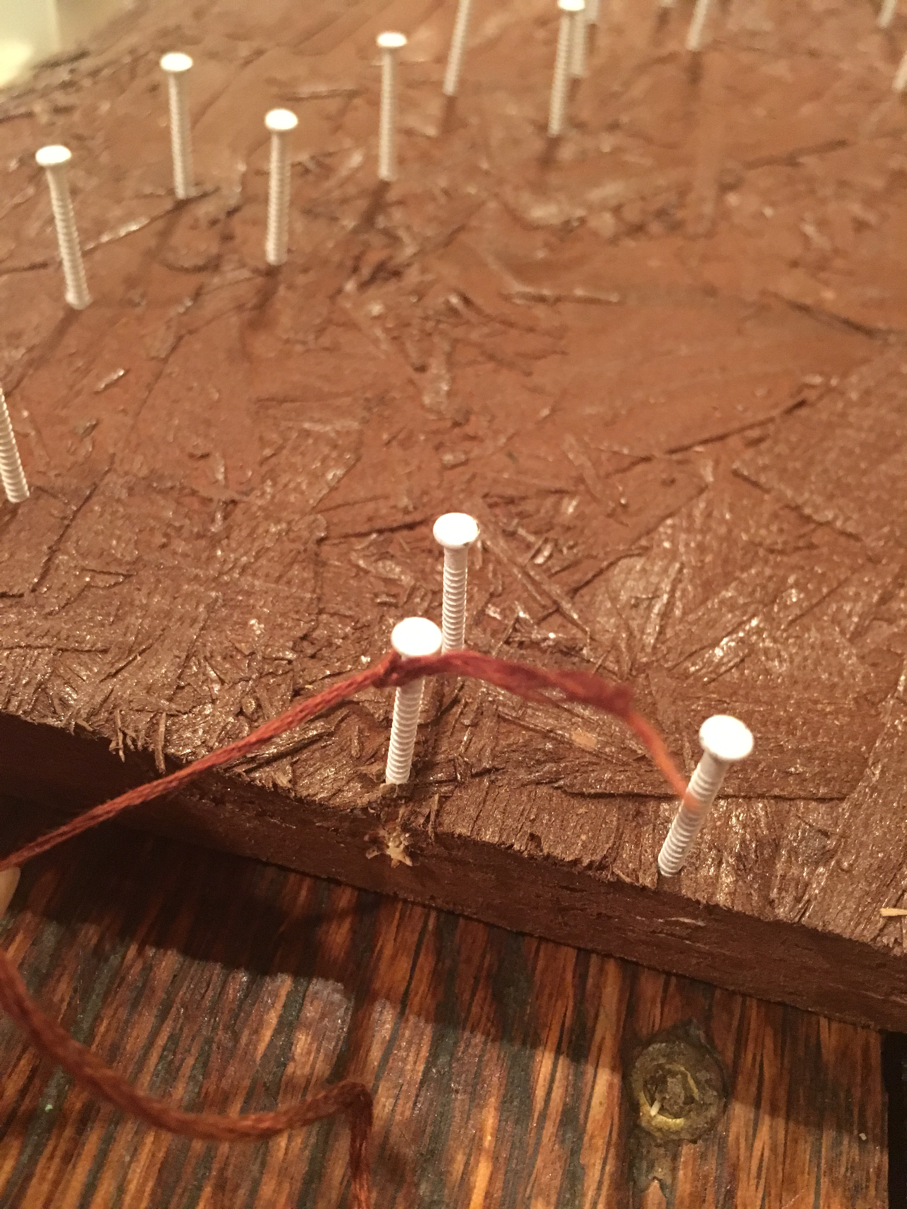
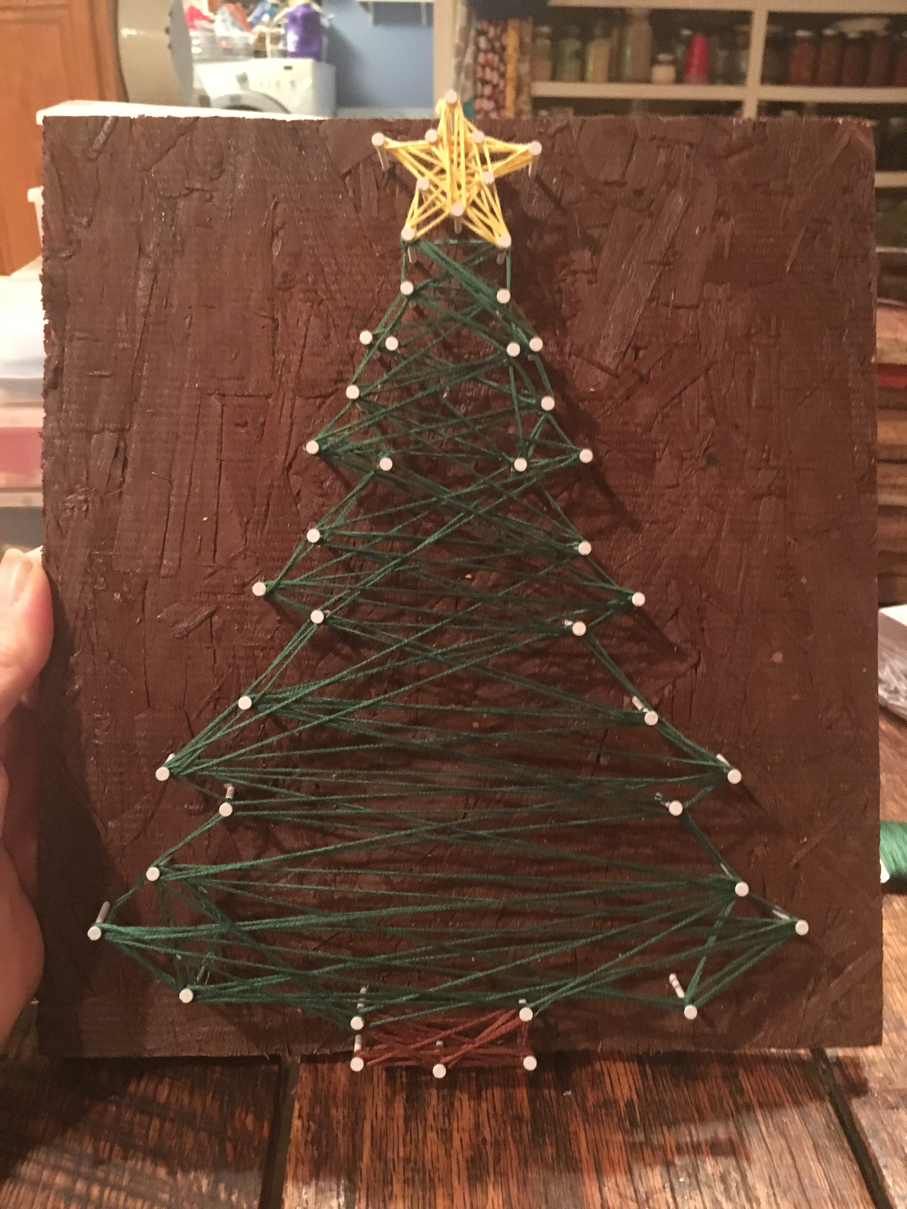
Look at your piece and think about if there are parts that need to be layered. As with mine, the base needs to be done first because part of the tree will be layered on top of that brown.
Double knot your string and begin winding it around the nails. Go in different directions so you can get coverage and a neat effect of the wrapped string.
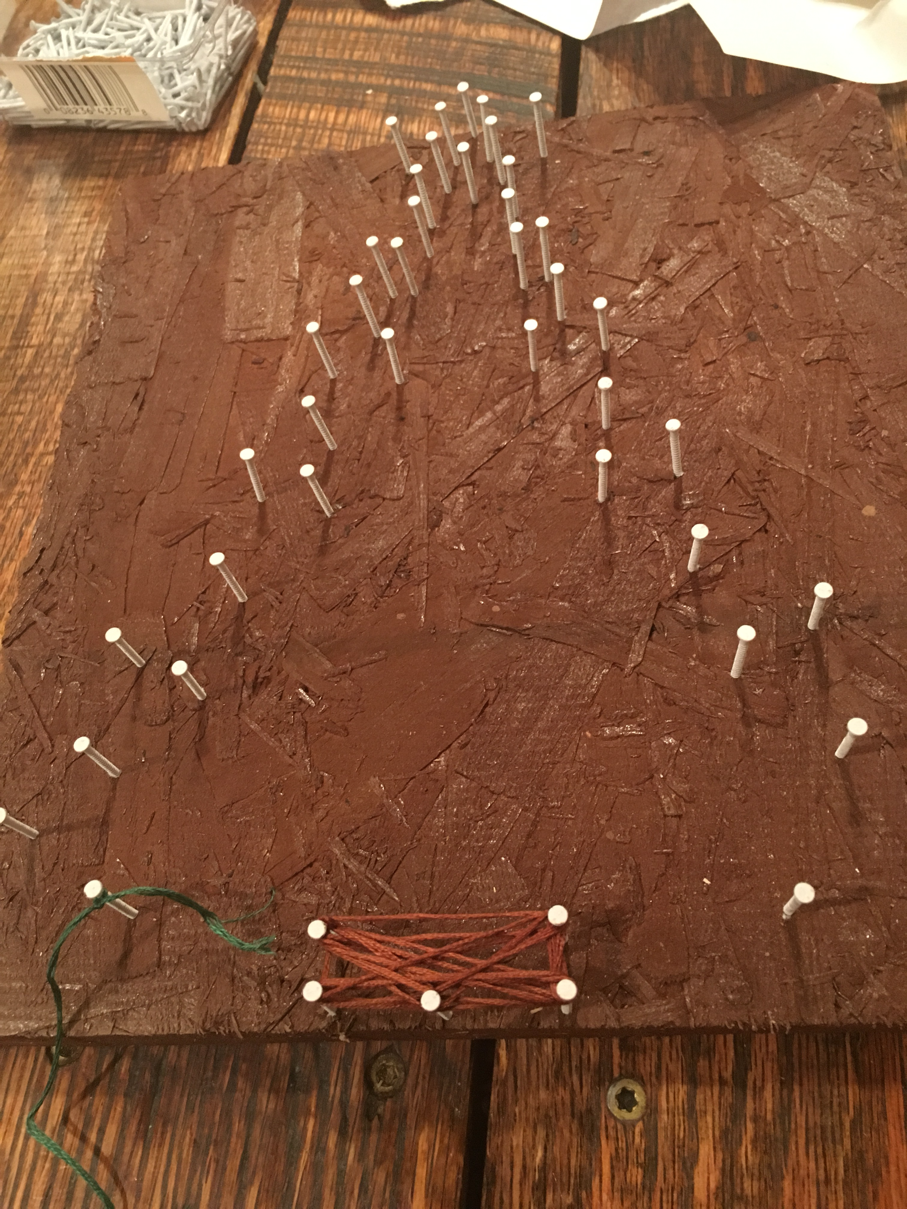
Tie that color off and trim the end and begin your next color.
Continue on until your piece is complete with all the texture and color you desire! Embellish if you so choose with buttons or jewels, or whatever your heart desires. This is a fun project and it makes a great gift!
Enjoy!!!