As we begin to enter the cooling off of the year and realizing there are times when we could use extra candles, I found an idea through Pinterest that I was determined to replicate!
You only need a few items and you are set!
I’ve made links for them throughout the post in case you are interested in ordering any of them. I plan on ordering more wax soon!

First you will need these candle wicks. You are only using 12, so you will have plenty extra for other projects or for another set or two of these emergency candles!
These are the candle wicks I bought, just slightly longer than what I needed for my half-pint jars.
Every time I hear half-pint, I think of Little House… don’t you?

You will need a dozen half-pint jars. You can buy these or you can use some you have or you could even look around for them at yard sales and thrift stores. No matter how many jars I have, if I see some in good shape at a thrift store… they go in my buggy. I use them for EVERYTHING!
Not. Even. Kidding.

You will also need wax. I bought this, the wax is a 5 lb bag of Soy Wax, found here.
It’s inexpensive and melts and pours super easy.
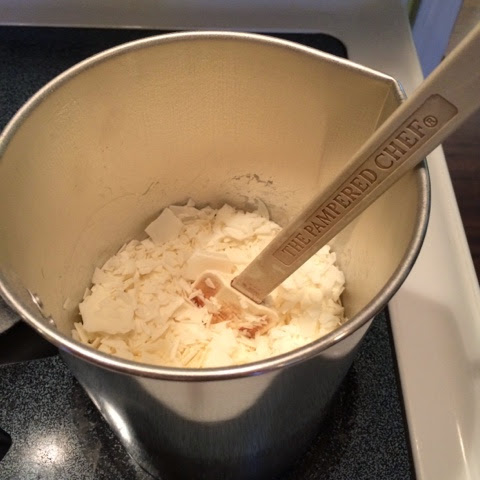
Begin pouring your wax in. It took the whole bag for my 12 candles. I poured in half and then started my double boiler.

I have a candle wax pitcher, but you could use a #10 can with a little squeeze on one side so you could use it to pour. Or an old pot. Whatever you can fit into another pot with hot water, sorta the double-boiler method to melt down your wax.
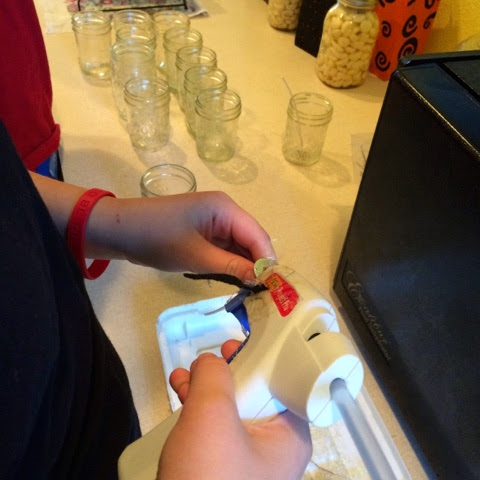
While your wax is melting down, take your jars, the wicks and your glue gun and pat a bit of hot glue on the anchor of the candle wick. Stick it to the center (or close to the middle) of the jar and proceed for all 12.

If it is not perfectly centered, do not fret. It’s fine.

Take your melted wax and pour into your candle jars.

Once poured, get a bit of aluminum foil and tear it into a small square. Make a small opening in the center and slip your wick right through. This will help the wick stand up straight while the wax cools.
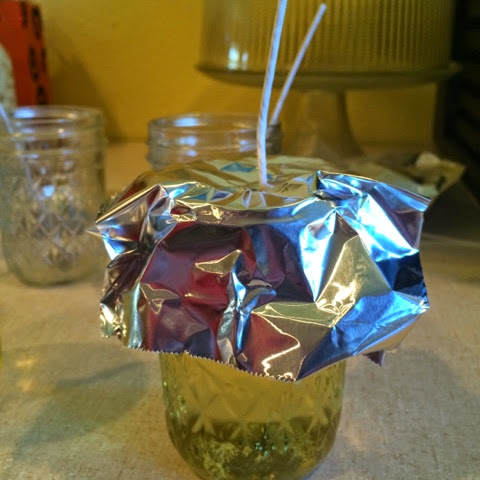
If your kitchen is cool, like mine… you will see the translucent wax become opaque.
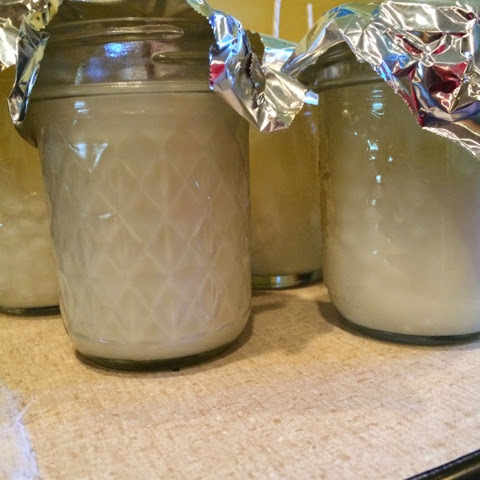
Once completely solid, pull off your foil and snip your wick.

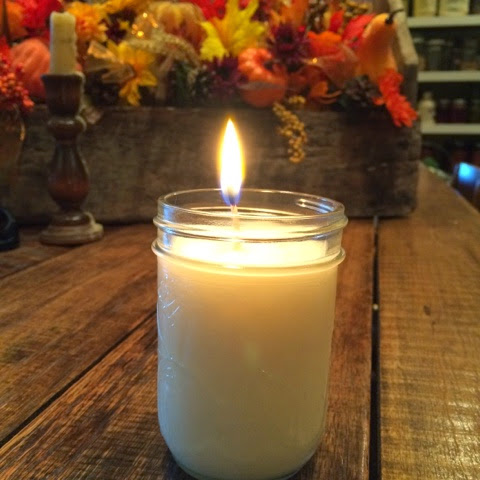
Done and Done!
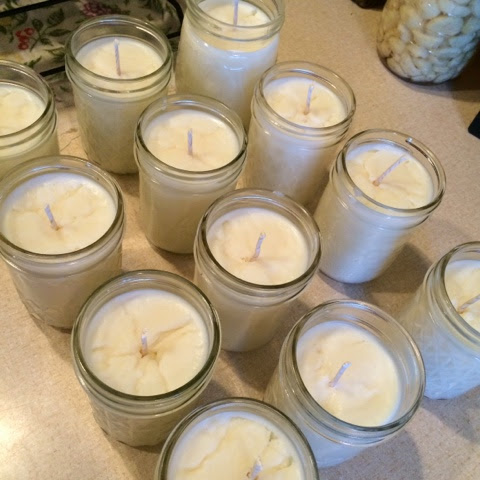
The great thing about these is that you have a basic candle, not a fru-fru, smelly one, but one that will burn for 40-50 hours! This is great! If you burn it around 4 hours at a time, your candle could last about 10 days! Not bad for the very small amount you paid for this little jewel!

Total Price:
Soy Wax- $14.69
Candle Wicks- $8.69
Jars (if purchased and really depending on WHERE you purchased, I’m going to estimate)- $10.00
That equals $2.78 per candle!
If you, like me, have jars picked up from thrift or left over from canning, then the price drops considerably! Making things
This is a great project that is fun for your kids to help you make. Also you are teaching them to be prepared. Something, in these days and times, you can’t be TOO much of.
Hope you enjoy!