I’ve had some chicken stock on my stove simmering for a while now and I thought it might be helpful to some if I took the fear out of making it yourself and canning it at home. It’s very easy and SO very good for you! Here’s how you do it!
For the stock, this is what I used:
I had 4 chicken carcasses (bones, fat, innards, tiny pieces of meat that you didn’t get picked off, it’s all good… even the feet. Although I didn’t have feet for this batch)
Water, if you have a filter, filtered water is best… but I don’t have one.
Carrots (several, whole, unpeeled)
Onions (Several, I just cut em in quarters or even halves if they are smallish)
Celery (I just break several stalks off and toss them in)
Fill the pot with carcass, veggies and then water. Put it in your crockpot or on your stove and simmer, not boil. Make it hot enough to cook down some, but not so hot that you are going to use all that water that will eventually make your stock.
I usually add a bit of water throughout the process, just so I get a good amount of stock.
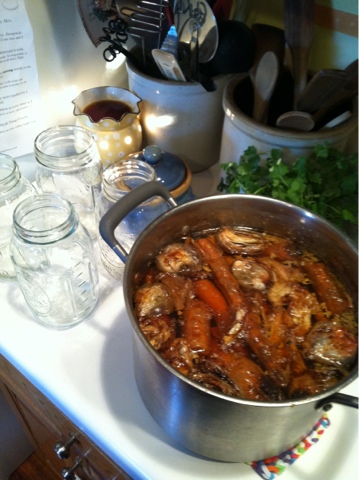
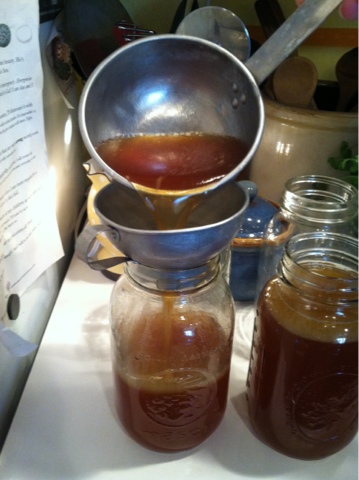
For this pot I rendered almost 4 quarts of stock. Not much, but still it is SO good and rich!
Isn’t it lovely?
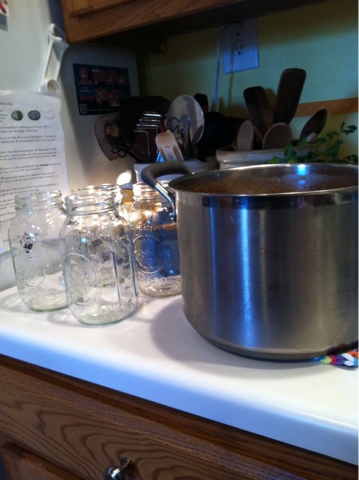
Prepare your jars.
Wash them with hot, soapy water. Or if you have a dishwasher, you can run them through a wash in there.
Now, here’s something new. A little detour, but I will quickly get back on track with how to make and can stock.
A couple of years ago, I bought some reusable canning jar lids. I like them just fine. They have worked well for me. However last Sunday, I found myself at a Homesteading Self Sufficiency Expo and was introduced to 4Ever Reusable Canning Lids I had bought 50 through a WAPF group that I belong to, and then at the expo a friend and I went in together and bought a set of 500 to share.
What sold me on them was this…
(from their site)
We upgraded the original rubber gasket by replacing it with an unbeatable silicon gasket. The silicon gasket will not stretch or dry out. It is not suseptable to nicks and cuts like other gaskets.
The other brand of reusable canning lids that I was using will eventually dry out and I will have to buy replacements.
These however are not supposed to. LOVE IT!
So today, I find myself using my new canning jar lids and I am very excited.
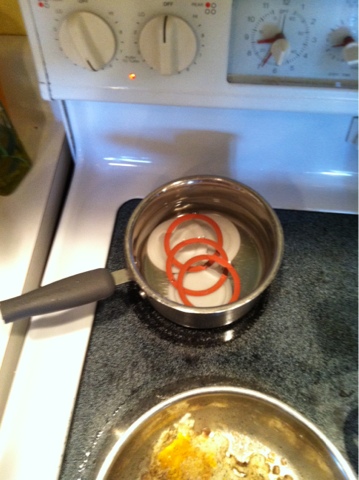
As per their instructions, simmer the lids just as you would any of your metal lids.
Please excuse this mornings breakfast of fried eggs in kerrygold butter…mmmm.
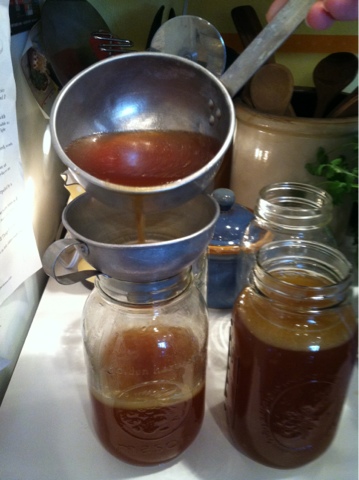
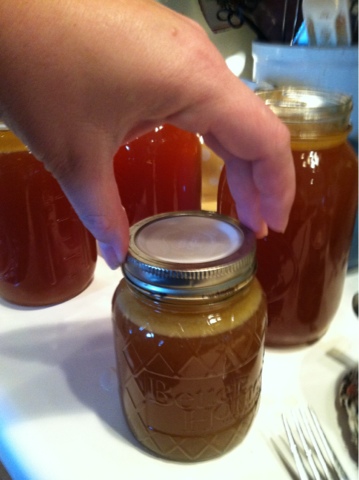
Once your jars are full and your lids are hot, take the gasket and place it on the lid.

Place it on your jar.
Simple, huh? haha

Take your ring and put it on your jar and just screw it on til it is just giving pressure. They call it ‘finger-tip’ tight.
You don’t want to tighten it way down before you can your jars.

Ugh.. who’s clawish looking hand?
Oh yeah, that’s mine. Sorry, folks.
Put your jars in your canner per your canner’s instructions.
Now, just in case you didn’t know, stock has to be pressure canned!
Not a water bath.
Ok?

My canner says, 3 quarts of water in the bottom, put your lid on after you add your jars.
Put on your pressure gauge, for chicken stock, my canner says 10 lbs of pressure.

Turn the stove eye on high and let it begin!!!
Once your little jiggly pressure gauge begins dancing on top, that is when you start your timing.
I pressure mine for 25 min.
After 25 minutes, remove the canner from the hot eye and let it cool COMPLETELY!!!!!! I have a safety mechanism on mine that will not allow the lid to be removed until all the pressure is released. That is a good thing. We can get ourselves in a hurry and really get hurt if we try to rush this process. So chill a bit. Read a book, sew a stitch or clean your house for a while. Let em cool.
Once the canner can be opened remove your jars. Set them somewhere that you can let em be for about 12-24 hours. You don’t want to disturb them while they are still completely cooling and sealing.
Once your jars are out of the canner, use an oven mitt and tighten your lids completely. This again is per 4ever’s instructions.
Then, store them in your canning pantry.
Chicken stock is so good. It is great for sickness, to use in place of store bought stock or broth in any of your recipes or just to sip for great nutrition.
And lest I forget to mention, I am totally SOLD on 4ever Canning lids! I will never purchase a metal canning jar lid again! I love this product!